In this tutorial you are going to learn how to use the Entity Framework Database First approach, through an example, to build a website using ASP.NET MVC for the management of a Robot Dogs production.
In the database first approach you start with an existing database, from which you can generate the models for your application.
If you don’t have a database, you can instead use a code first approach, where you generate the database from data classes.
Let’s explain the database approach with a simple example, in which we are going to create an ASP.NET MVC application.
1. Create a database
You should start from point 2 if you already have one.
- Launch Visual Studio
- Open the View tab -> Server Esplorer
- Right click on Data Connections -> Add Connections…
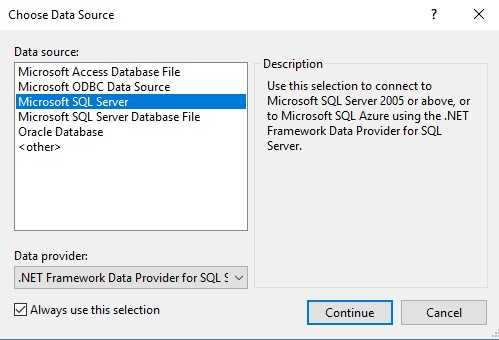
- Select Microsoft SQL Server
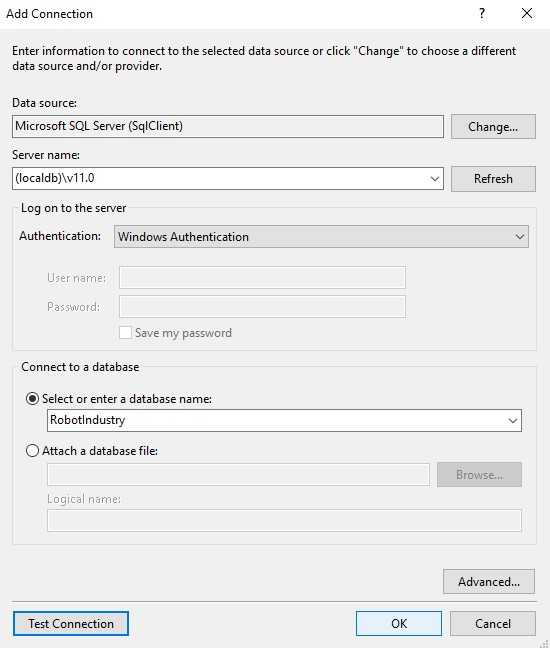
- Add a connection to LocalDb, choosing a database name.
Depending on your Visual Studio version, you may have to use SQL Express, simply insert .\SQLEXPRESS in the Server name field. - Visual Studio will ask you if you want to create a new database. Select Yes.
- In Server Explorer right-click on the newly created RobotIndustry (or the name you chose) and select New Query.
Insert this sql:CREATE TABLE [dbo].[RobotFactories] (
[RobotFactoryId] INT IDENTITY (1, 1) NOT NULL,
[Name] NVARCHAR (200) NULL,
[Location] NTEXT NULL,CONSTRAINT [PK_dbo.RobotFactories] PRIMARY KEY CLUSTERED ([RobotFactoryId] ASC)
);CREATE TABLE [dbo].[RobotDogs] (
[RobotDogId] INT IDENTITY (1, 1) NOT NULL,
[Name] NVARCHAR (200) NULL,
[Armed] BIT NOT NULL,
[RobotFactoryId] INT NOT NULL,
CONSTRAINT [PK_dbo.RobotDogs] PRIMARY KEY CLUSTERED ([RobotDogId] ASC),
CONSTRAINT [FK_dbo.RobotDogs_dbo.RobotFactory_RobotFactoryId] FOREIGN KEY ([RobotFactoryId]) REFERENCES [dbo].[RobotFactories] ([RobotFactoryId]) ON DELETE CASCADE
);


2. Create the application
We will test the database approach with an ASP.NET MVC application.
Create one.


When the project is ready, install Entity Framework:
Tools Menu -> NuGet Package Manager -> Package Manager Console
In the console, write the command : Install-Package EntityFramework
3. Generate the model
What we are going to do now is to generate our robotic models from the database.
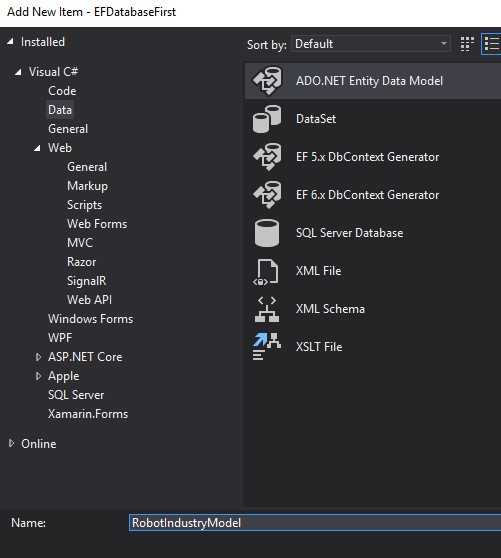
- Right-click on the Models Folder -> Add -> New item…
- Select a new ADO.NET Entity Data Model
- Choose EF Designer from data… and click Next
- From the dropdown choose your existing database (like the one you create in the first part of the tutorial) and click Next
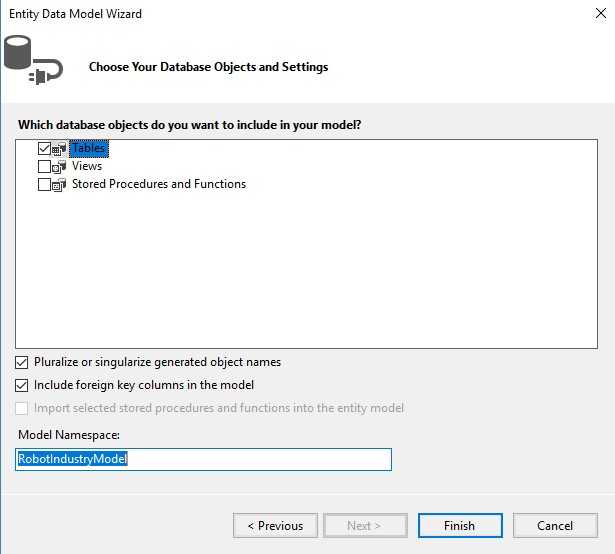
- Check Tables and finally click Finish
You may receive a security warning, click Ok to complete the generation. - Once completed you will see the .edmx file, with your models.


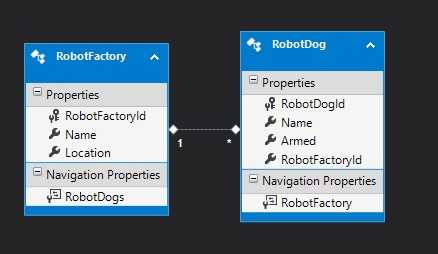
4. The generated model
Take a look at the edmx generated in the Models folder and expand it.

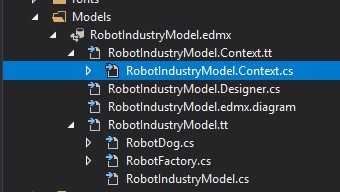
- RobotIndustryModel.Context.cs contains the DbContext derived class, which is the one that let us interact with data as objects
- RobotDog.cs and RobotFactory.cs are the classes that model our database tables
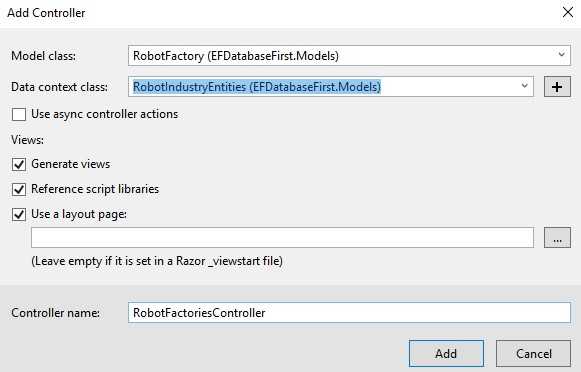
5. Add a Scaffolded Controller
Time to use these models!
Add a new Scaffolded Item to the Controllers folder!


Select MVC 5 Controller with views, using Entity Framework and fill the form.
This will generate a controller and some views for CRUD operations.

6. Try it!
Run the application!
Once it started, navigate to ‘/RobotFactories/’ (your controller name).
You will see the Index page of the RobotFactoriesController.
Click Create New and create a couple of factories for our industry.


Now return to Visual Studio and open View -> Server Explorer
Expand the connection created earlier, Tables, right-click on the RobotFactories table and select Show Table Data


You will see that the table has been populated with the factories we just created.
Now you can just repeat the Scaffolding part for the RobotDog class.
Conclusion
This is the end of this tutorial.
You have created and learnt a lot of things in this example, making good use of the Entity Framework Database First approach for the creation of your model starting from a database.