In this tutorial we will learn how to use Entity Framework Core 2.0, to manipulate some data in an ASP.NET Core MVC application.
Core is the new version of Entity Framework. It doesn’t implement all his features, but it’s a powerful and lightweight framework.
Contents for Entity Framework Core Tutorial
Create a new project
After installing all the required magic stuff, we need to create the project:
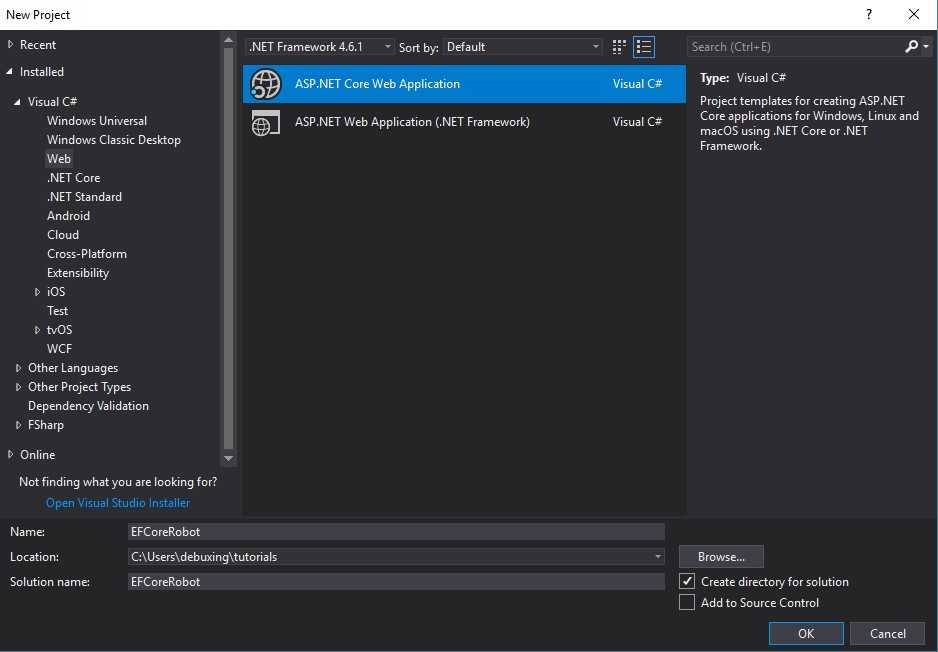
- File -> New -> Project…
- Select the ASP.NET Core Web Application template, and name the project as you prefer.
- Select ASP.NET Core 2.0 and the Web Application (Model-View-Controller) template.
Also, for this tutorial, make sure that No Authentication is chosen. Click Ok to create the project.


Create Database and Models
Database first approach
In the database first approach the first thing you want to do is… Yes, create a database, you guessed right.
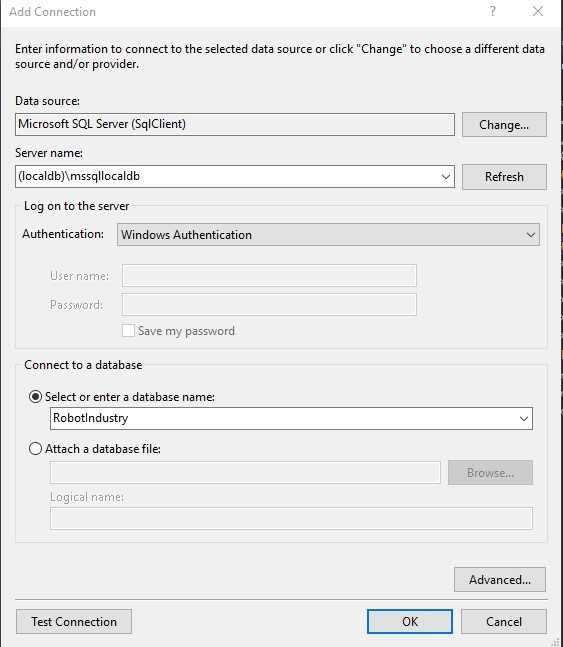
In this tutorial we will use LocalDb to host our data.
In Visual Studio:
- Open the Tools tab -> Connect to Database
- Fill the fields:
- Click yes when asked to create the database

Now we have a database and it’s time to create two tables:
- Open the View tab and click on Server Explorer
- Find the new database in Data Connections -> Right-click -> New Query
- Insert the query
USE [RobotIndustry];
GO
CREATE TABLE [RobotBuilding] (
[RobotBuildingId] INT NOT NULL IDENTITY,
[Name] nvarchar(MAX) NOT NULL,
[Location] nvarchar(MAX),
CONSTRAINT PK_RobotBuilding PRIMARY KEY (RobotBuildingId)
);
CREATE TABLE [RobotDog] (
[RobotDogId] INT NOT NULL IDENTITY,
[Name] nvarchar(MAX) NOT NULL,
[Armed] bit,
[RobotBuildingId] INT NOT NULL,
CONSTRAINT PK_RobotDog PRIMARY KEY (RobotDogId),
CONSTRAINT FK_RobotBuilding FOREIGN KEY (RobotBuildingId) REFERENCES RobotBuilding(RobotBuildingId) ON DELETE CASCADE
); - Execute Order 66.
..the query. It was the query. - As you can see in Data Connections the tables have been created.
- Add some really simple data to the RobotBuilding table:
INSERT INTO RobotBuilding (Name, Location)
VALUES ('RobotLand', 'Paris'), ('Robot Center', 'Houston')


Create the model
We have a database. Following the database first approach now it’s the time to create our model classes.
We call in action the Command Line Tools that come with EF Core, and we use the scaffolding potential:
- Open the Package Manager Console. (View tab -> Other Windows -> Package Manager Console)
- Run the following command:
Scaffold-DbContext "Server=(localdb)\mssqllocaldb;Database=RobotIndustry;Trusted_Connection=True;" Microsoft.EntityFrameworkCore.SqlServer -OutputDir Models
The classes have been generated in your Models folder.
If you have problem using the tools, maybe you need to install them.
Fire the Package Manager Console up and type:
Install-Package Microsoft.EntityFrameworkCore.Tools
Code first approach
In the Code first approach we create the classes that define the model and a context.
Once created, we can generate the database from our entities.
The first two classes model the production of awesome robot dogs!
In the Models folder create the class RobotDog.cs:
{
public int RobotDogId { get; set; }
public string Name { get; set; }
public bool Armed { get; set; }
public int RobotBuilding{ get; set; }
public virtual RobotBuilding RobotBuilding { get; set; }
}
And also the class RobotBuilding:
{
public int RobotBuildingId { get; set; }
public string Name { get; set; }
public string Location { get; set; }
public virtual ICollection<RobotDog> RobotDogs { get; set; }
}
Now, we need a Context. The Context is the main class of Entity Framework responsible of the interaction with data as objects.
Create the class RobotContext in the Models/ folder:
{
public RobotContext(DbContextOptions opts)
: base(opts)
{ }
public DbSet RobotDogs { get; set; }
public DbSet RobotBuildings { get; set; }
}
The two DbSet are properties that represent the tables in the database to be generated.
The context constructor sets the configuration using Dependency Injection, which gives our class what it needs.
In this case we need something to tell the context which connection string to use for accessing the db.
Create Migrations
We set up the model.
Now we are going to use migrations to generate database tables from these models.
- Open the Package Manager Console. (View tab -> Other Windows -> Package Manager Console)
- Run the command
Add-Migration StartTheBuilding
A class for the migration will be created in a new folder, Migrations
- Run the command
Update-Database
Seed some data
It would not be so bad to have some data to test our futuristic application.
We can just create a class containing the seed data, called RobotSeed.cs:
{
private RobotContext context;
public RobotSeed(RobotContext context)
{
this.context = context;
}
public async Task SeedRobotBuildings()
{
if (!context.RobotBuilding.Any())
{
context.RobotBuilding.Add(
new RobotBuilding()
{
Name = "Jurassic Robotic Park",
Location = "Isla Nublar"
});
context.RobotBuilding.Add(
new RobotBuilding()
{
Name = "The Builder: Wild Robot",
Location = "Novigrad"
});
await context.SaveChangesAsync();
}
}
}
We just added two robot buildings to the context (to the database).
Next step is to configure the application to use this class.
Where can we do this? Yes, in the Startup.cs.
Add
services.AddTransient();
at the end of the ConfigureServices method and
{
seedBuildings.SeedRobotBuildings().Wait();
}
catch (Exception e)
{
throw e;
}
in the Configure method.
Connect application to database
In ASP.NET Core services as RobotContext are registered in Startup.cs.
You can find it in the root of your project.
Open it and edit the ConfigureServices method:
{
services.AddMvc();
services.AddDbContext(opts -> opts.UseSqlServer(Configuration.GetConnectionString("RobotContext")));
}
The GetConnectionString(“RobotContext”) method search for a value in your configuration file, whose key is “RobotContext”.
The configuration file used in this case is appsettings.json, where you have to add the connection string:
"RobotContext": "Server=(localdb)\\MSSQLLocalDB;Database=RobotIndustry;Trusted_Connection=True;MultipleActiveResultSets=true"
}
Create a controller
Now we are going to create a controller using scaffolding:
- Right click on the Controllers
- Select Add -> Controller..
- Make sure that Full Dependecies is selected
This enables the scaffolding power.
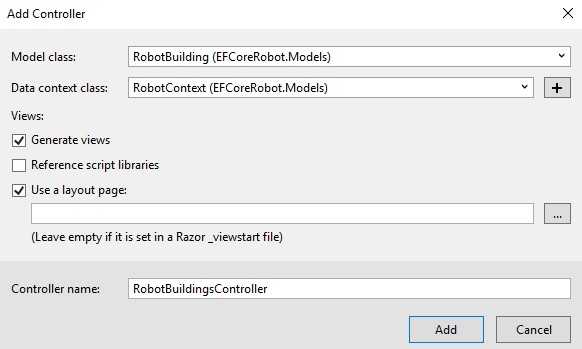
Next thing is to use this newfound ability to scaffold a controller for the Robot Buildings:
- Right-click on the Controllers folder -> Add -> Controller..
- Select MVC Controller with views, using Entity Framework and click Add
- Fill the fields:
And click Add

Try it
Start the project and navigate to /robotbuildings.

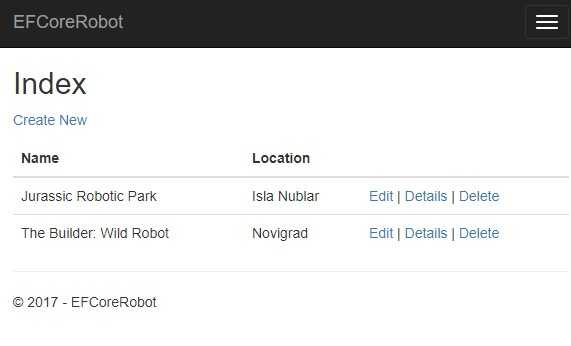
Our application is working!